

SAML SSO Integration Guide
This guide explains how to configure SAML Single Sign-On (SSO) integration with our platform. We'll cover setup instructions for three popular identity providers: Keycloak, Azure Entra ID (formerly Azure AD), and Google Workspace.
General Requirements
Before setting up SSO, you'll need the following information from our platform:
- Entity ID (Audience URI):
https://your-domain.com - Assertion Consumer Service (ACS) URL:
https://your-domain.com/api/auth/saml/callback - Name ID Format:
urn:oasis:names:tc:SAML:1.1:nameid-format:emailAddress
Group Mapping
Our platform supports automatic team and role assignment through SAML group mapping. Groups should follow this format:
bcl-<team>-<role>Available roles:
viewer: Can view loan requests and summariesloanOperations: Restricted view of loan requestbankLoanAgent: Can create and manage loan requestsbankLoanManager: Can manage loan requests and assign agentsbankLegal: Can perform legal tasks and reviewsbankApprover: Can approve loan request actionsbankAdmin: Can manage users, teams, and settingsbankThemeAdmin: Can manage users, teams, and settingsprofessional: Third-party professionals appointed by the bank
Example: <company prefix>-bcl-development-bankLoanAgent
Identity Provider Setup Instructions
Before configuring your Identity Provider, you'll need to set up an SSO provider in Banclo and gather the necessary information.
Configuring SSO Provider in Banclo
Navigate to the SSO Providers section in Settings:
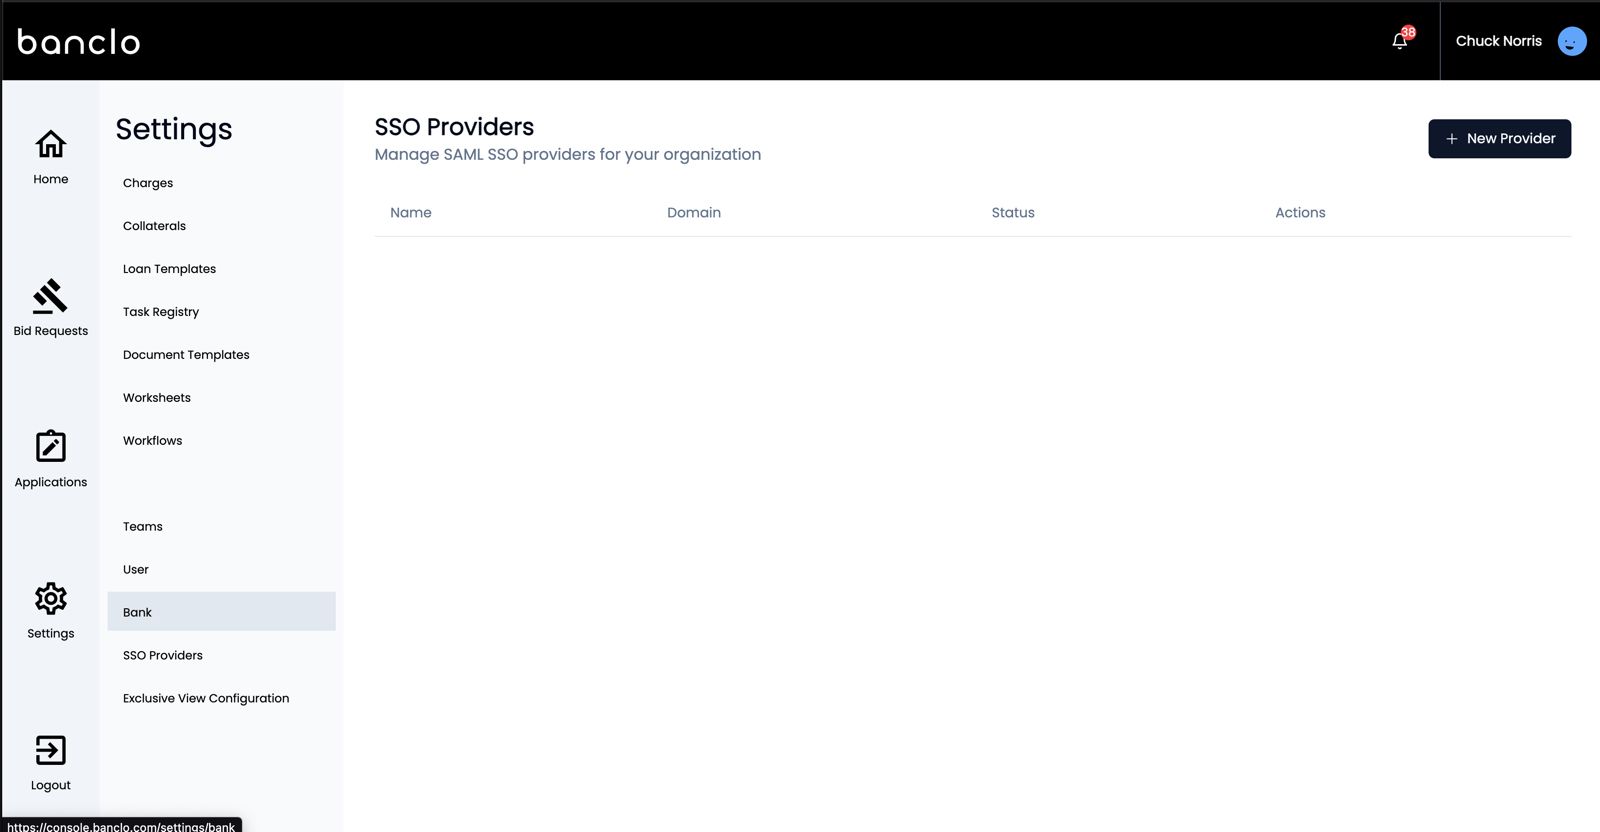
Create a new provider. Give it a name and bind it to a domain . This will be checked against the emails. Exmple acme.com will check all users with email login
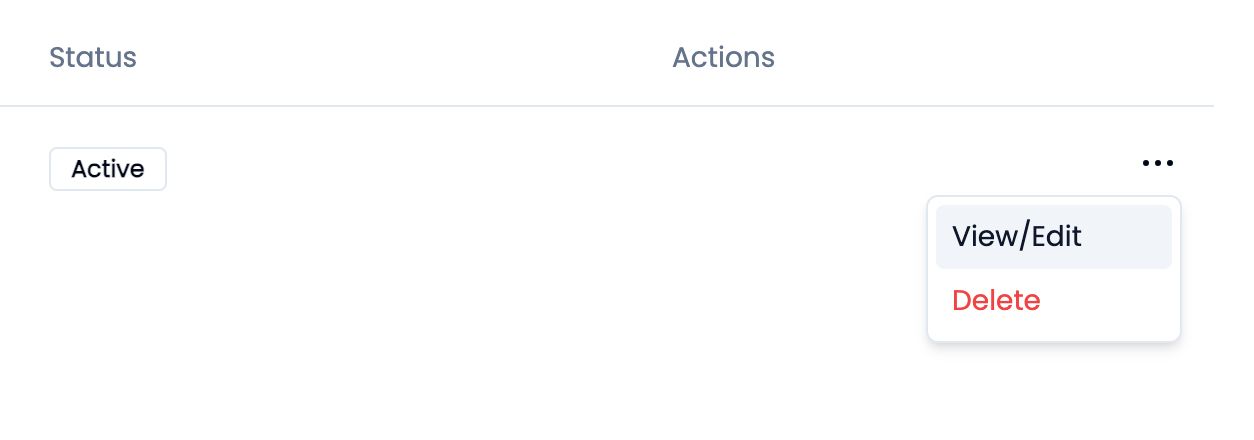
@acme.comAfter creating a provider, click the View/Edit button to access provider details:
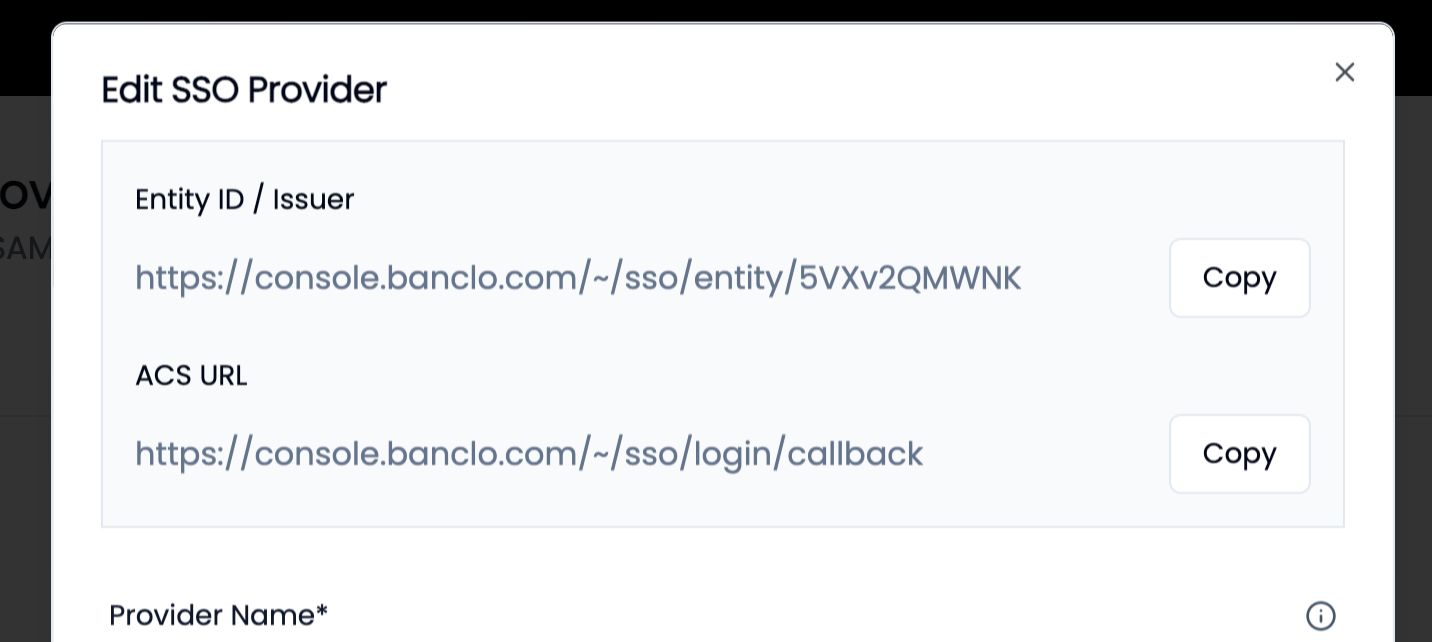
Copy the Issuer and ACS URL - you'll need these for your IdP configuration:
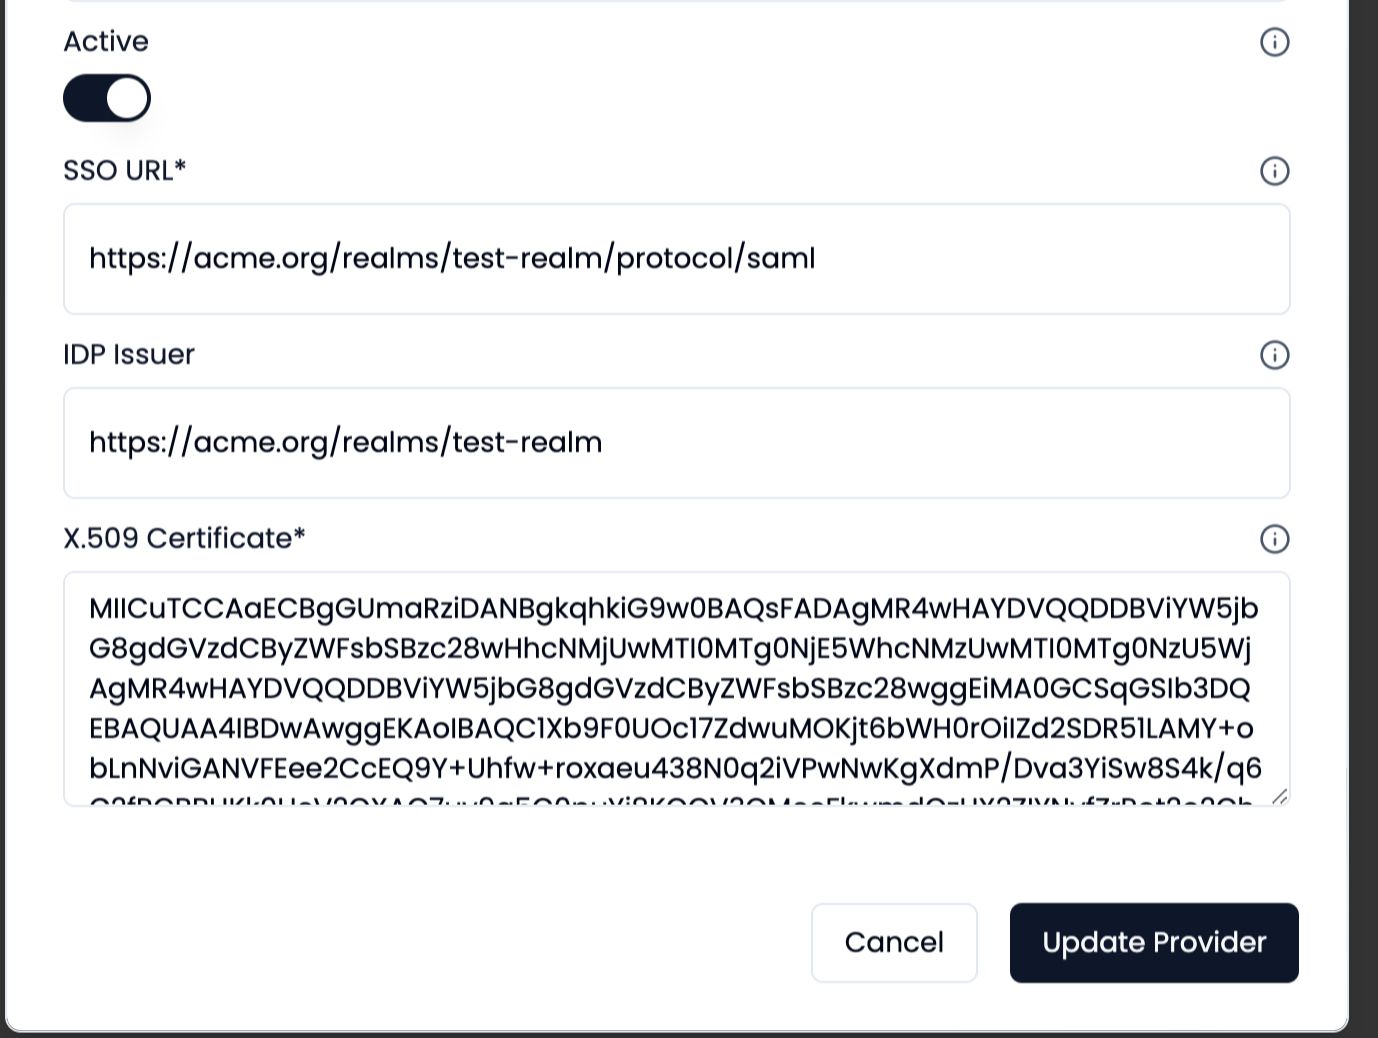
Once you've configured your IdP, return to this screen to enter the Certificate, SSO URL, and IdP Issuer:
1. Keycloak
Create a new SAML Client:
- Log in to Keycloak Admin Console
- Select your realm
- Go to Clients > Create Client
- Select SAML as the Client Protocol
Configure Client Settings:
Client ID: <Entity ID from Banclo>
Client Protocol: saml
Client SAML Endpoint: <ACS URL from Banclo>
Configure Mappers:
- Create a "Group Membership" mapper:
- Name:
groups - Mapper Type:
Group list - Group attribute name:
groups - Full group path:
OFF
- Name:
- Create a "Group Membership" mapper:
Download Certificate:
- Go to SAML Keys
- Download the certificate (X.509 format)
Configure Groups:
- Create groups following our naming convention (e.g.,
bcl-development-bankLoanAgent) - Assign users to appropriate groups
- Create groups following our naming convention (e.g.,
2. Azure Entra ID (formerly Azure AD)
Register Enterprise Application:
- Go to Azure Portal > Azure Entra ID
- Enterprise Applications > New Application
- Select "Create your own application"
Configure SAML:
- Select "Single sign-on" > SAML
- Basic SAML Configuration:
Identifier (Entity ID): <Entity ID from Banclo>
Reply URL (ACS URL): <ACS URL from Banclo>
Sign on URL: <Your application login URL>
Configure SAML Signing Certificate:
- In the SAML Signing Certificate section:
- Ensure the certificate status is Active
- Set Signing Option to: Sign SAML response and assertion
- Download the Base64 certificate
Important: Azure Entra ID must have "Sign SAML response and assertion" enabled for proper authentication. If you experience authentication issues, verify this setting is correctly configured.
- In the SAML Signing Certificate section:
Configure User Attributes & Claims:
- Add group claims:
- Select "Edit" in User Attributes & Claims
- Add group claim
- Select "Security groups" with format
bcl-*-*
- Add group claims:
Configure Groups:
- Create security groups following our naming convention
- Assign users to appropriate groups
3. Google Workspace
Add Custom SAML App:
- Go to Admin Console
- Apps > Web and mobile apps
- Add Custom SAML App
Configure SSO Settings:
ACS URL: <ACS URL from our platform>
Entity ID: <Entity ID from our platform>
Name ID Format: EMAIL
Configure Attribute Mapping:
- Add group membership attribute:
App attribute: groups
Category: Basic Information
User field: Groups
- Add group membership attribute:
Download Certificate:
- Download the X.509 certificate from the SSO settings
Configure Groups:
- Create Google Groups following our naming convention
- Ensure group names are synced correctly in SAML attributes
- Assign users to appropriate groups
Testing the Integration
- Create a test user in your IdP
- Assign the user to appropriate groups
- Try logging in to our platform using the test user's email
- Verify that:
- SSO login works successfully
- User is assigned to correct teams and roles based on groups
Troubleshooting
Common issues and solutions:
Login fails with "Invalid SAML Response":
- Verify the certificate is correctly uploaded
- Check that the Entity ID matches exactly
- Ensure clock synchronization between systems
- For Azure Entra ID: Verify "Sign SAML response and assertion" is enabled in SAML Signing Certificate settings
Azure Entra ID Authentication Issues:
- Navigate to Azure Portal → Enterprise Applications → Your SAML App → Single Sign-On
- Check SAML Signing Certificate section:
- Certificate must be Active
- Signing Option must be set to "Sign SAML response and assertion"
- If "Signed Responses" was disabled, re-enable it for security best practices
Groups not mapping correctly:
- Verify group names follow the exact format:
bcl-<team>-<role> - Check group attribute mapping in IdP configuration
- Ensure groups are being included in the SAML assertion
- Verify group names follow the exact format:
User not receiving correct permissions:
- Verify user is assigned to the correct groups in IdP
- Check group naming matches our required format
- Review SAML response for correct group attributes